How to create transactional emails in Mailvio
How to plug Transactional Emails into your Website, Ecommerce Store, App, or just about anything else.
Transactional emails enable you to send your day-to-day emails (Order Confirmations, Welcome Emails, Password Reminders, etc) through managed, trusted servers as well as gaining access to stats on how those emails perform in terms of interactions and deliverability. Find out more about Transactional Emails here.
While this all might sound a little bit complicated, it's actually a very simple job for a developer to the plugin. We even provide ready-to-go code samples for almost all of the main languages.
Here's how to get started.
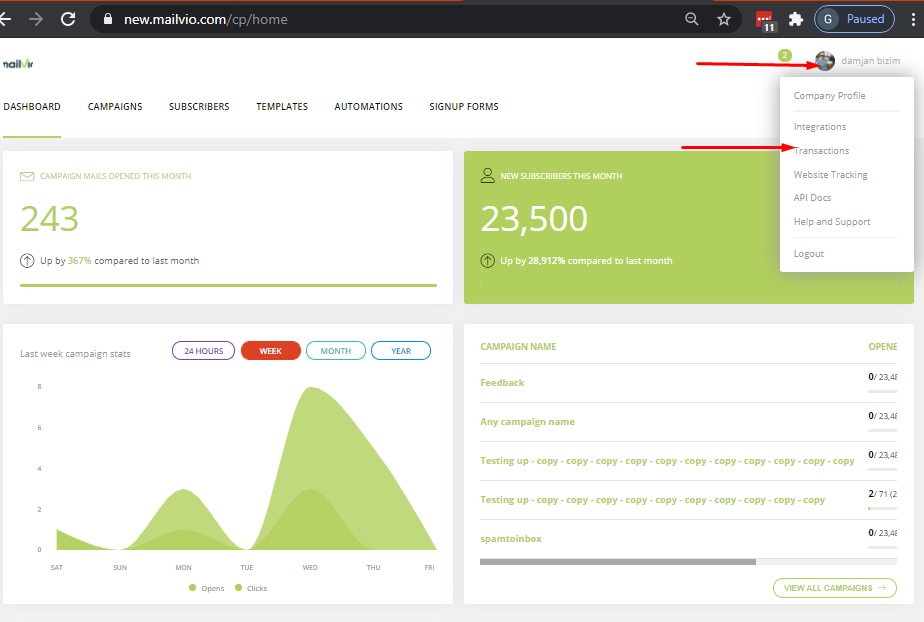
Step 1: Log in to your MAILVIO account and click the "Transactions" after clicking your account name on the top-right of the page.
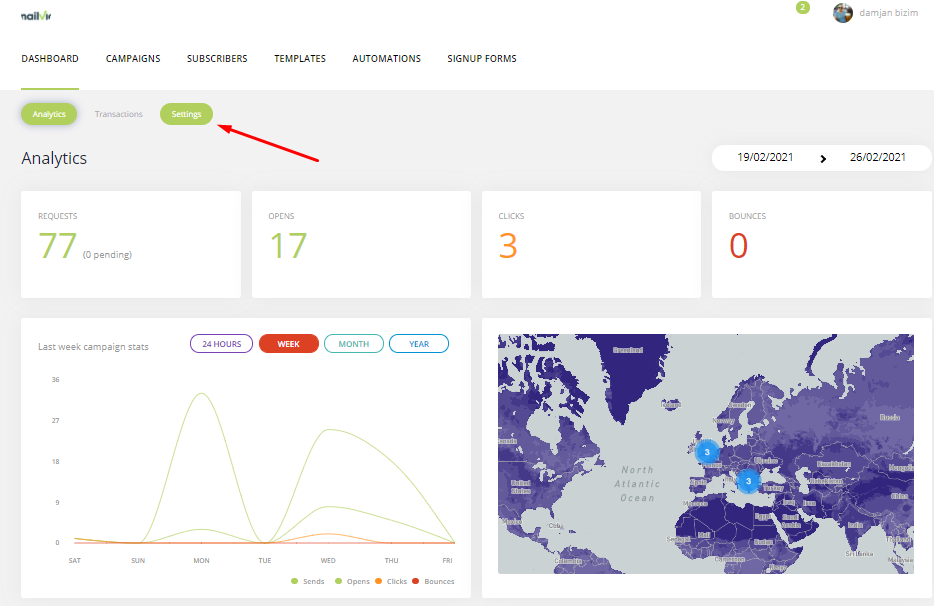
Step 2: Click the "Settings" tab towards the top of the page.
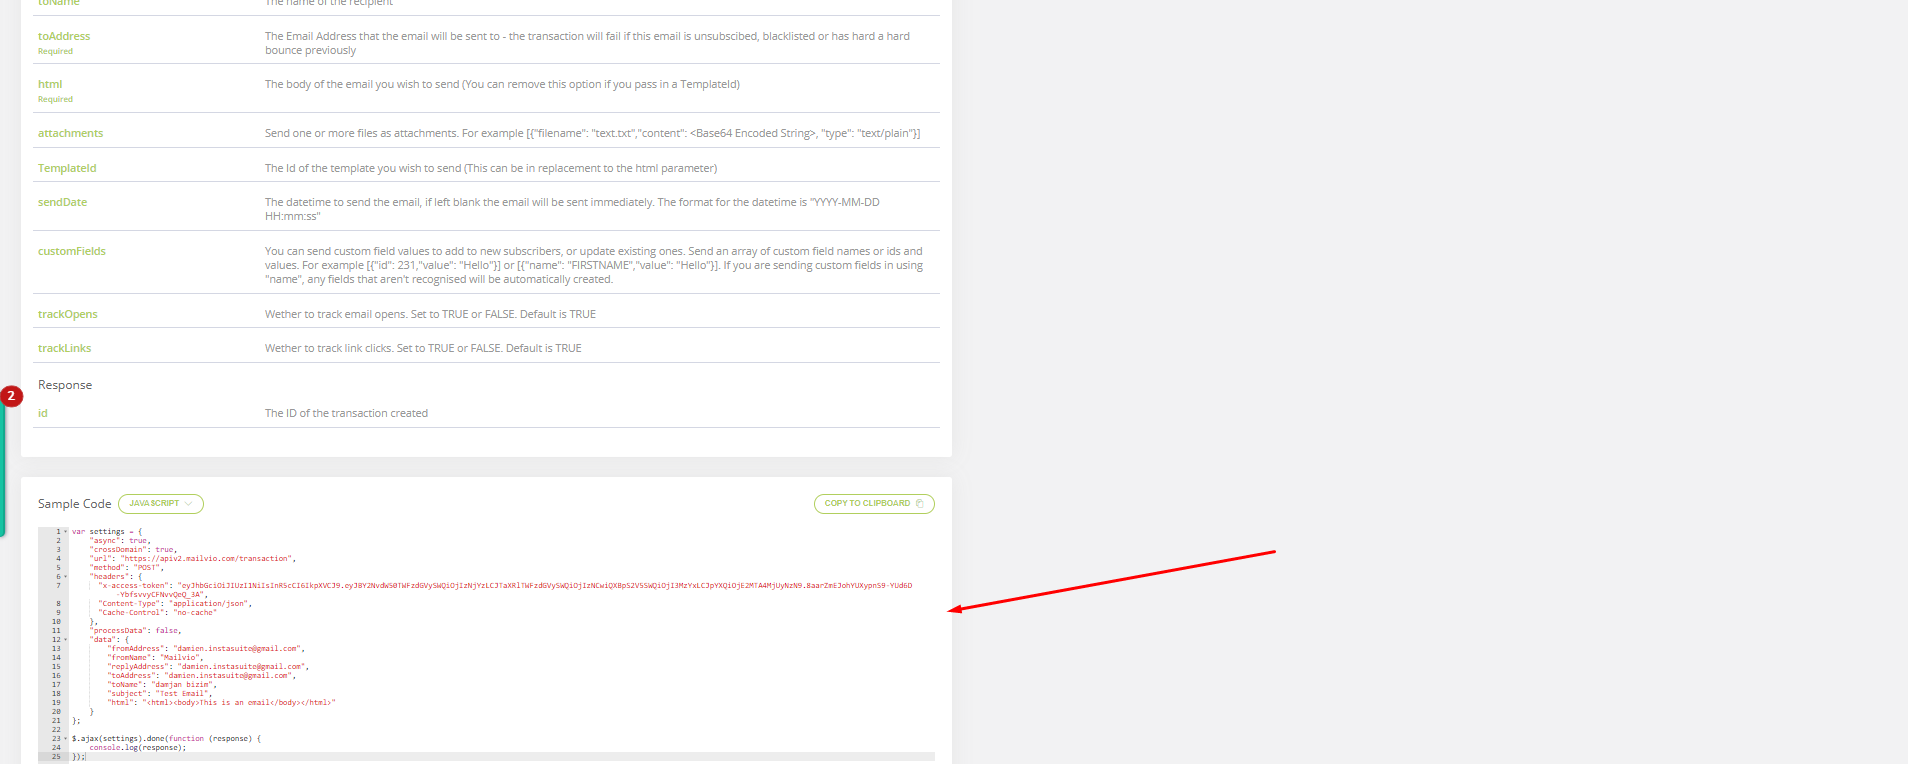
Step 3: Scroll down and select your programming language from the drop-down, copy the Sample Code (which already has your Access Token filled in) and paste it into your own codebase.
You are Plugged In!
Congratulations. You have now plugged your app into the power of the MAILVIO backend. You can now enjoy great inboxing and full visibility over the emails you are sending, who's opening, interacting, etc, and what's causing problems (junk reporting, bounces, etc).
Advanced Configuration
There's much more you can do with the transactional email system than this basic example shows. For a full list of options that you can pass in and out please log in and visit the "Transactional" area of the MAILVIO control panel.
Ready to get started?
Related Articles
Why you need transactional emails
What are Transactional Emails? No matter what your business, the chances are you are going to need to send one-off emails to visitors and customers. For example, when a new user signs up to become a member of your site you might want to send them a ...Create and send polls with Mailvio
Create and Send Polls with Mailvio Step 1: Before you begin, you must make sure you are logged in to the MAILVIO control panel. Step 2: Once logged in to the MAILVIO control panel, click the "TEMPLATES" tab at the top of the screen. Step 3: On this ...How to create a welcoming sequence
In this video, we'll show you how to create an effective welcoming sequence for your target market or niche. Let's dive in! Step 1: Log in to your Mailvio account. Step 2: Click the Automations tab, and then click the Create Automation button. Step ...Welcome to Mailvio
Welcome to Mailvio! We focus on your email deliverability. We're sure you're super excited to dive into Mailvio, but we recommend moving step by step. We've created a structured path for you to follow to get the most out of it. Simply click on any ...How to create a Table of Contents in your email
We understand the importance of organizing your email content effectively to enhance reader experience. Follow these steps to seamlessly create a table of contents in your emails and simplify navigation for your recipients. Step 1: Open Your Email ...


